Pre-processing data and developing efficient model on a given data set is one of the daily tasks of machine learning engineer with commonly used languages like Python or R. Not every machine learning engineer would get a chance or requirement to integrate the model into real time applications like web or mobile for end users to consume directly. It would be a great learning if a data scientist can develop model and integrate into web application by himself. This will give complete sense of how models are utilized in the real-world applications. In this blog, I will take you through the steps of building an automated web application over a basic machine learning model, Multiple Linear Regression.
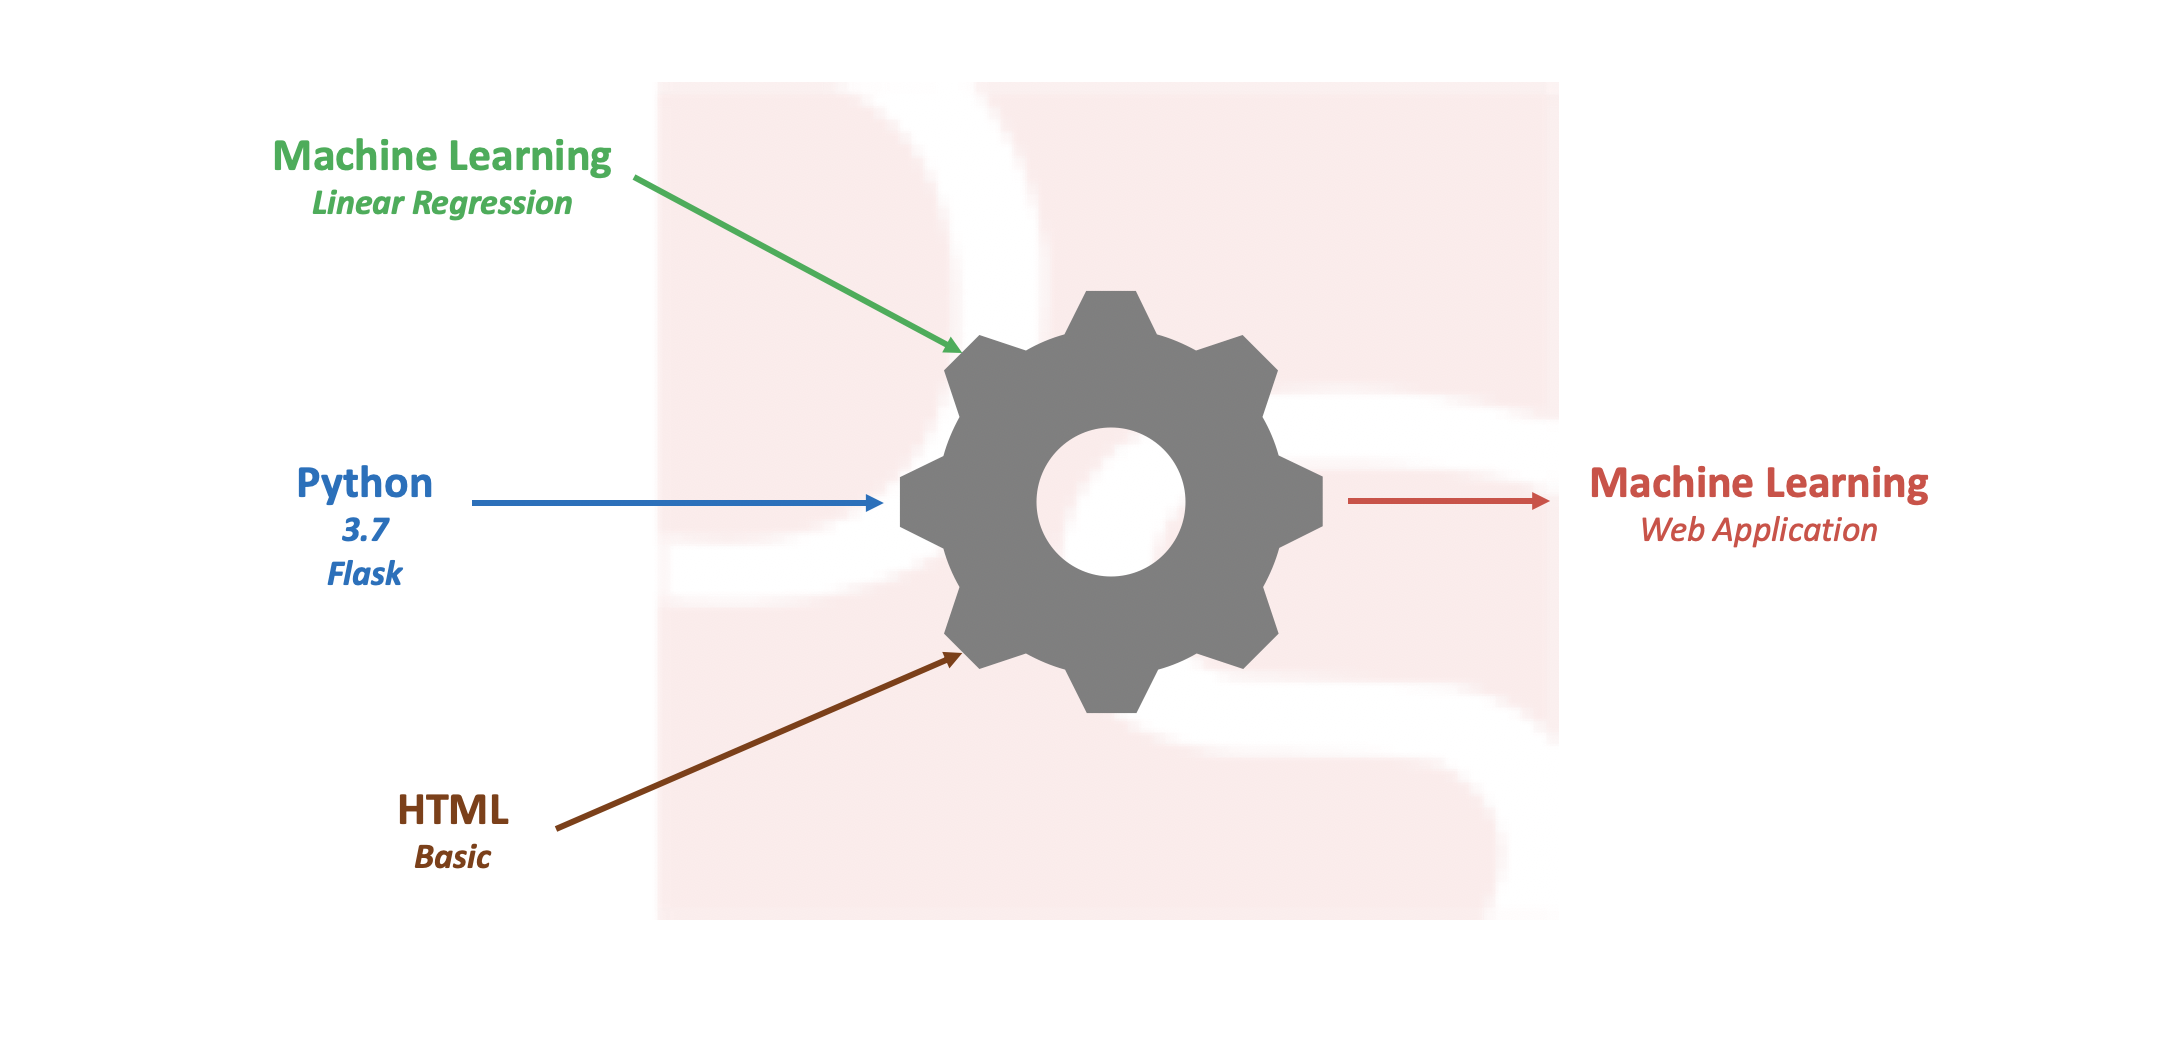
With the following tech/languages, we are going to build the web application. It is good to have basic and fundamental knowledge on the below before you move ahead.
- Linear Regression
- Basic HTML – https://www.w3schools.com/html/html_basic.asp
- Python 3.7 – https://www.python.org/downloads/
- GitHub – https://github.com
- PyCharm IDE (Community) – https://www.jetbrains.com/pycharm/download
Not to worry if you have no prior knowledge on above items, I will be taking you through code in the detail that is needed for you to understand and replicate (In the YouTube video). In enterprises, you would have dedicated team to build better UI/UX for your model and hence having basic skill is sufficient enough to do it yourself.
Step 1: Deal with data

The screenshot above is the dataset of Basketball players of 54 records. To keep this exercise easy with respect to building a Linear Regression model, this small dataset has been downloaded from here.
Basket_ball.xlsx – 40 players data
Basket_ball2.xlsx – 54 players data
Problem statement: For the above Basketball players data, build a multiple linear regression model such that with given height, weight, success field goals %, success free goals % predict average points a player with these attributes would score?
This dataset doesn’t need any pre-processing steps. While dealing with real world data, there needs effort in dealing with nulls, outliers, standardizing, normalizing data or any other pre-processing as required.
Step 2: Model building
Objective of developing a linear regression model is to build a best possible equation (Least possible errors) that can be integrated into applications to predict “avg_points”. But in this blog, we are not going to tune the model to its best as our primary intention is to learn how to integrate a model into web applications. In the automate step, we are going to do few changes to the model and understand how it reflects in the application for end users.
# Run or refresh model
def model(x):
if x == 1:
OSdata = OSpd.read_excel(
‘basket_ball.xlsx’)
else:
OSdata = OSpd.read_excel(
‘basket_ball2.xlsx’)
OSdataX = OSdata[[‘height_ft’, ‘weight_pd’, ‘successfieldgoals%’, ‘successfreethrows%’]] OSdataY = OSdata[‘avg_points’] global OSLM
OSLM = OSlm.LinearRegression()
global bbmodel
OSLM.fit(OSdataX, OSdataY)
bbpred = OSLM.predict(OSdataX)
rmse = mean_squared_error(OSdataY, bbpred)
return OSLM, rmse
*As described above, this is not the best model. It is default model and we deploy the same in web application. Two different data sources (files) are utilized in this blog, to explain how application can be automated with certain assumptions.
Step 3: Build web application
There are multiple frameworks to build a web application using Python, but in this blog, I have chosen Flask framework (https://en.wikipedia.org/wiki/Flask_(web_framework)) as it is simple and easy to understand.
# Home page that renders for every web call
@flaskapp.route(“/”)
def home():
return render_template(“home.html”)

if __name__ == “__main__”:
port = int(os.environ.get(‘PORT’, 9000))
global OSLM, Error
OSLM, Error = model(2)
flaskapp.run(host=’0.0.0.0′, port=port, debug=True)
Route(/) will load home.html when the home page is loaded in the browser and take user inputs to parse into model to predict.
Step 4: Integrate user inputs with model
# Predict from the model build
@flaskapp.route(‘/predict’, methods=[‘POST’, ‘GET’])
def predict():
if request.method == ‘POST’:
input_values = request.form

inputX = OSpd.DataFrame(json_normalize(input_values))
input = inputX[[‘height_ft’, ‘weight_pd’, ‘successfieldgoals%’, ‘successfreethrows%’]] predval = OSLM.predict(input)
input[‘predval’] = predval
input.columns = [‘Height (feet)’, ‘Weight (pounds)’, ‘Field Success (%)’, ‘Free Success (%)’, ‘Predicted Avg Score’] return render_template(‘predict.html’, tables=[input.to_html()], titles=input.columns.values)
Route(/predict) will load predict.html page with the prediction results.
Now run the application from command line or through PyCharm.
Step 5: Build HTML pages
Home.html
<html>
<body>
<form action = “http://localhost:9000/predict” method = “POST”>
<p>Height (feet) <input type = “text” name = “height_ft” /></p>
<p>Weight (pounds) <input type = “text” name = “weight_pd” /></p>
<p>Field Success (%) <input type = “text” name = “successfieldgoals%” /></p>
<p>Free Success (%) <input type =”text” name = “successfreethrows%” /></p>
<p><input type = “submit” value = “Predict” /></p>
</form>
</body>
</html>
Predict.html
<!doctype html>
<title>Predict</title>
<div>
<h1>Prediction Results</h1>
{% for table in tables %}
{{ table|safe }}
{% endfor %}
</div>
Step 6: Automate
Automating ML models is much important to plan and design the application. Changes made in the model should be independent of Web Application. It is important to keep improvising the model throughout its life, because of:
- New data
- Deploy a better algorithm
- Handle data types etc…
In this blog we assume that “New data” has been added in the source, additional 14 players data have been received, we should be rebuilding the model by including these records. Hence, we have basket_ball2.xlsx file with total of 54 players data (40 old, 14 new). Just by changing the code to import data from second file, the web application still remains the same but interestingly predictions will be much refined with new model.
Check this video below for detailed explanation of this blog.
Data and python code is available in the GitHub (https://github.com/pawanyaddanapudi/ml-webapp) repository. Please fork it and explore.
Caveats:
- Refer this blog to exercise and get hands on how machine learning models are integrated into web applications
- Linear regression model built in this blog is not the best one, it can have its own cycle of tuning
- Web interface was very basic without any CSS styling
- In this code, model is built when web application is run. But in real world, building models are separate from this web application and are only called when loading home page

myadmin
hey nice blog